Ozbilt's last build for a client
Moderator: Moderators

Re: Ozbilt's last build for a client
Planned, but unused VIN locations. Certainly would have been better than ones that did use.

Re: Ozbilt's last build for a client
My thoughts exactly.Dwayne wrote:Planned, but unused VIN locations. Certainly would have been better than ones that did use.
My first thought was it may have been a government decision to have it where Ford ended up putting them. However, Chrysler stamped them in the plenum along with the radiator support and also the left front rail behind the bumper bracket.
So my guess it was just easier for Ford to hydraulic punch them where they did. Agree they are now in a spot that made it easier for rebirthing.
Kerry
To our wives and sweethearts. May they never meet
To our wives and sweethearts. May they never meet
Re: Ozbilt's last build for a client
Especially considering front end collisions would require new aprons.
In 50yrs hindsight, how many rusty plenums are now being replaced
In 50yrs hindsight, how many rusty plenums are now being replaced

Re: Ozbilt's last build for a client
Those tabs are on the A pillar forward panel and top lip of the firewall.Dwayne wrote:Especially considering front end collisions would require new aprons.
In 50yrs hindsight, how many rusty plenums are now being replaced
If you were to replace the plenum, they would be untouched.
Last edited by ozbilt on Sat Jul 25, 2020 8:01 am, edited 1 time in total.
Kerry
To our wives and sweethearts. May they never meet
To our wives and sweethearts. May they never meet
Re: Ozbilt's last build for a client
The left quarter panel was fitted & glued on first. The rear wheel arch has its edge turned up like a door skin, that way there is no lip to catch a tyre.
The rear outer wheel arches were "massaged" for extra clearance & the lip removed. The inner wheel arch at the lower inside corner was moved inwards. This allows the car to take 10" rear rims with no issue.
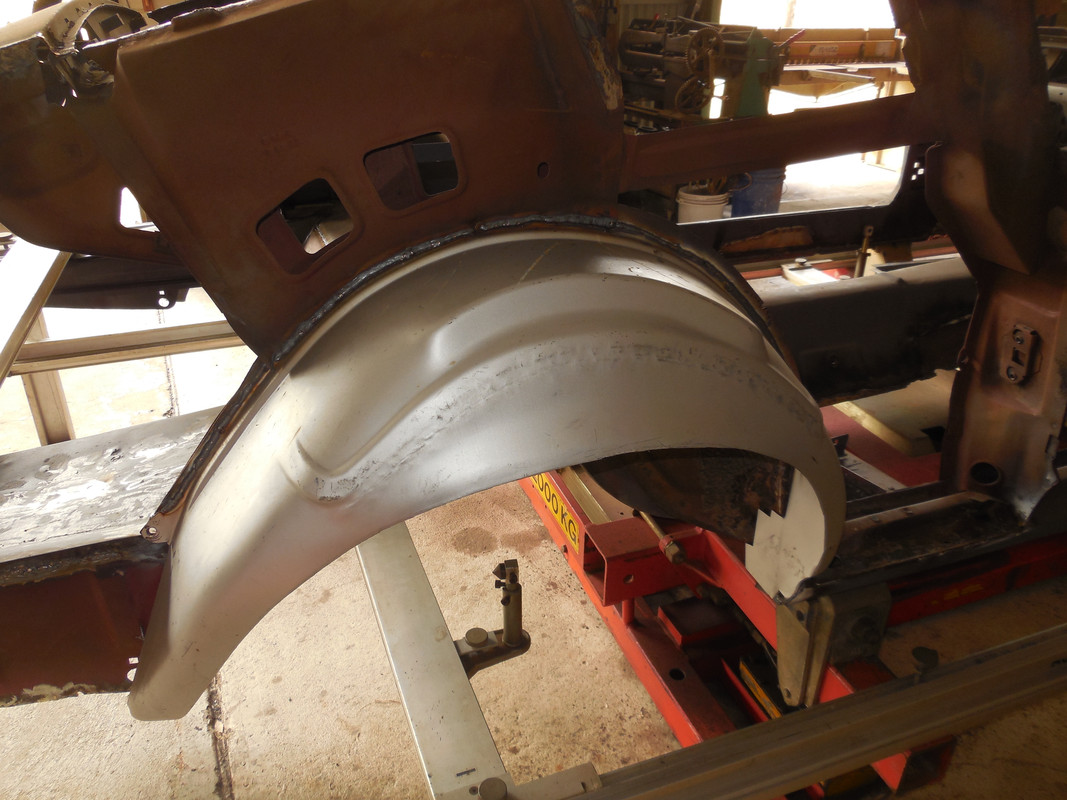
Left quarter glued. I get the gaps close on the door & trunk, but not perfect, I can take care of that later.
For now it getting the rear window opening totally correct & the wheel arch hammered up & rocker edge glued ......
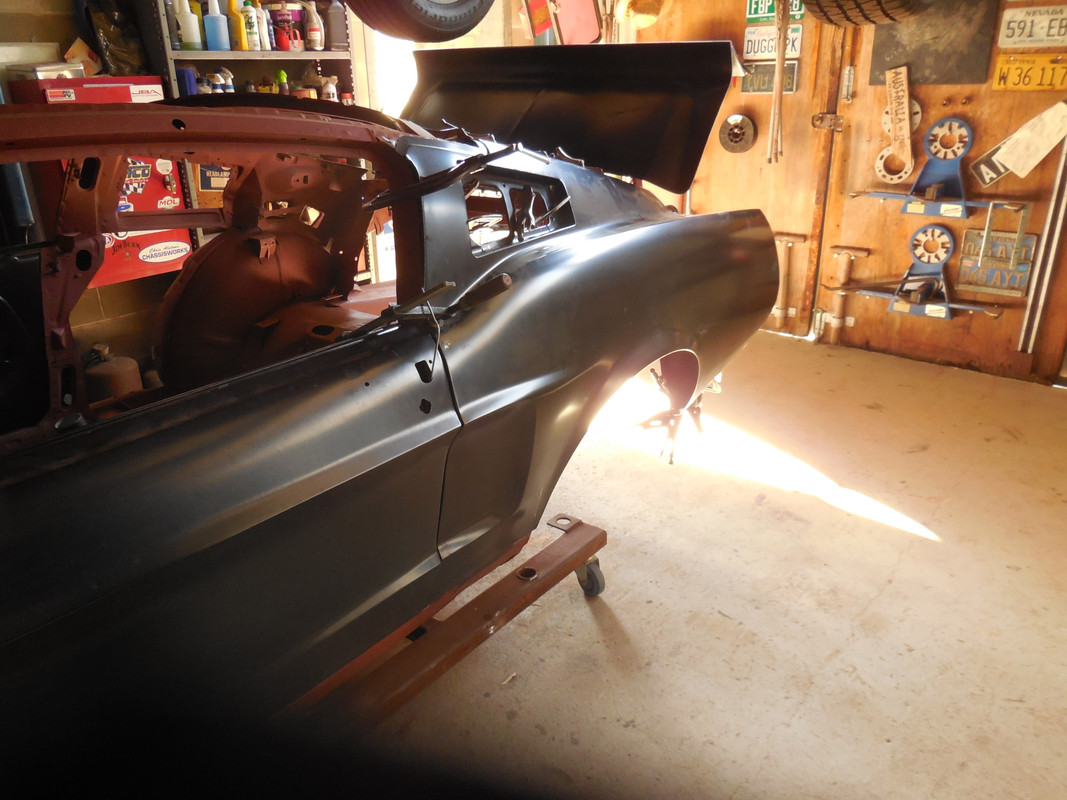
A day later it is the right hand quarter's turn to be glued. You can see the turned up wheel arch lip in this pic .......
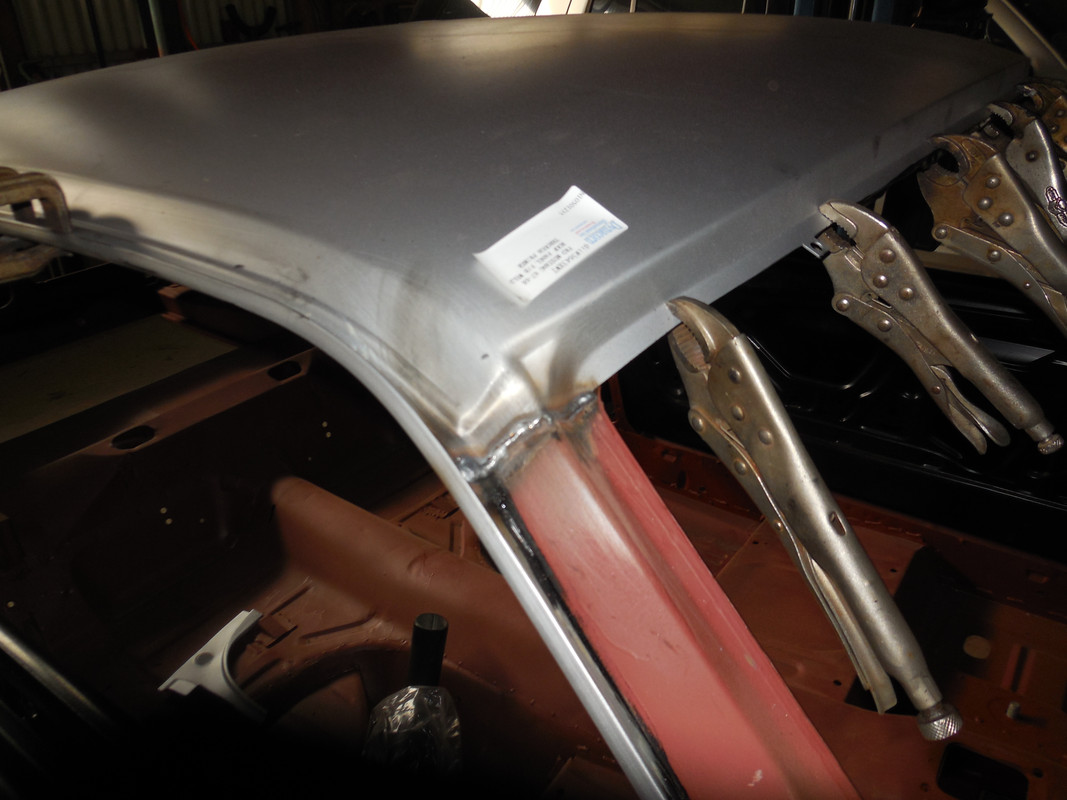
The following day saw the roof skin glued. Fortunately I have a few pairs of vice grips .......

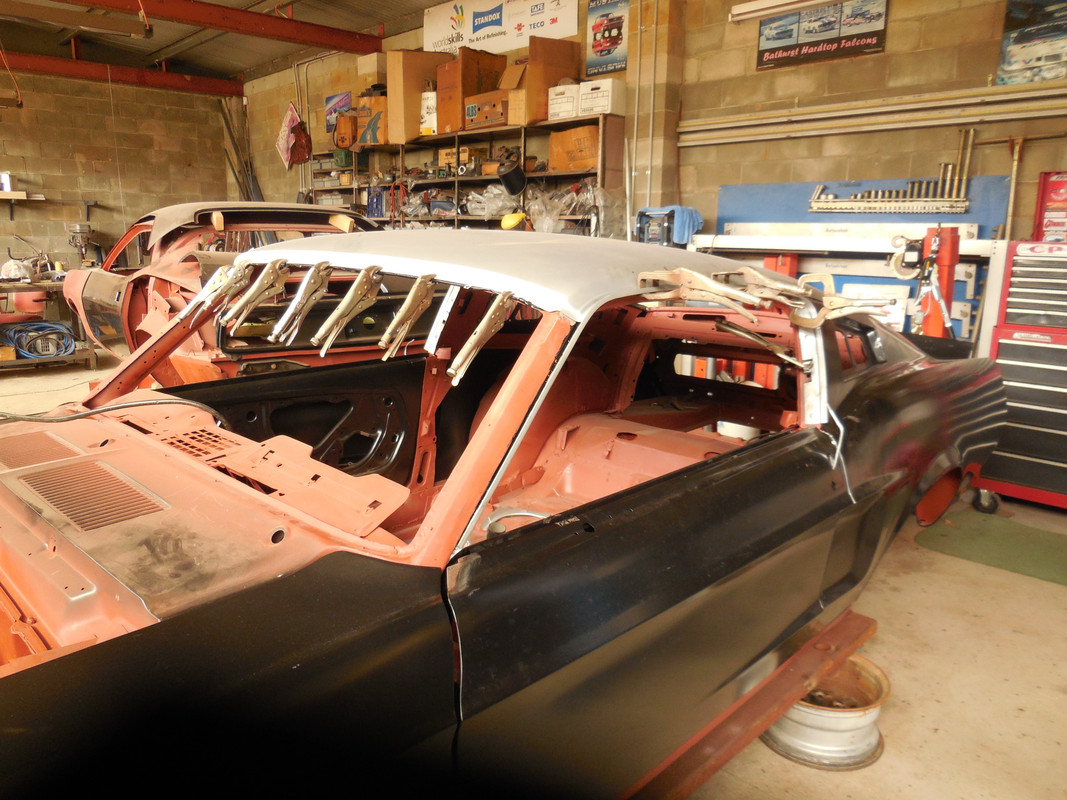
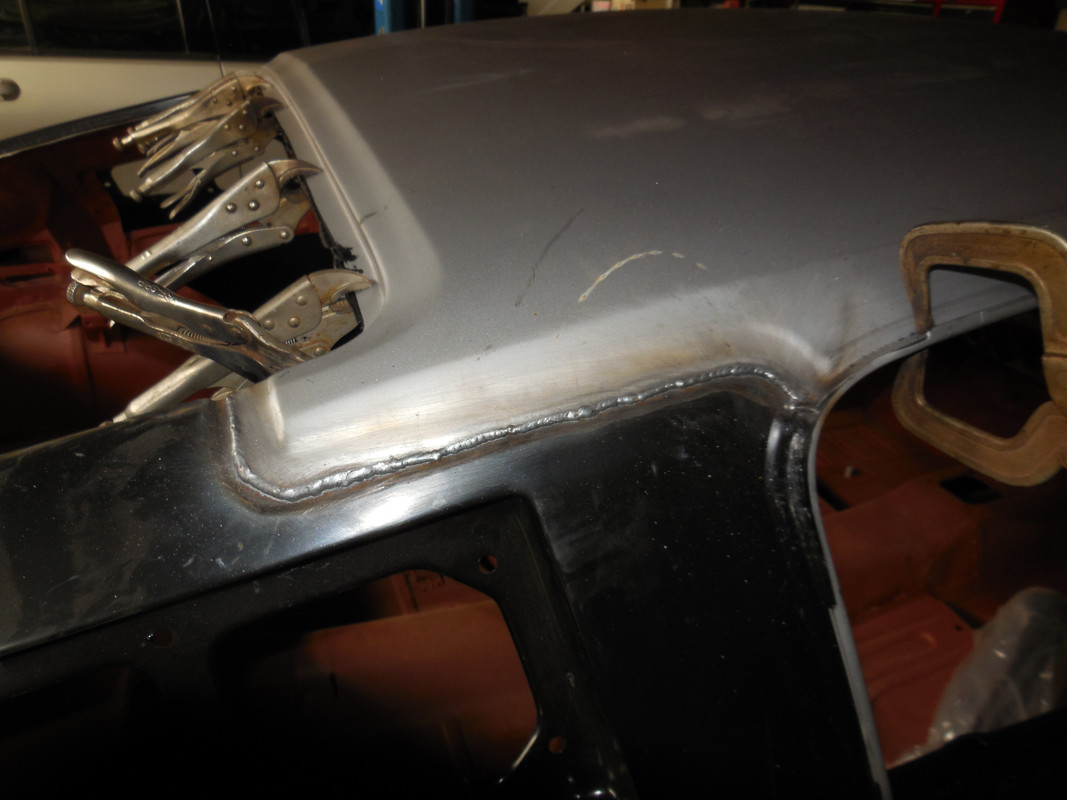
After the glue had set (24 hours) the panel joins (where the car previously had lead filler) were fully MIG welded so plastic filler could now be used .....
The rear outer wheel arches were "massaged" for extra clearance & the lip removed. The inner wheel arch at the lower inside corner was moved inwards. This allows the car to take 10" rear rims with no issue.
Left quarter glued. I get the gaps close on the door & trunk, but not perfect, I can take care of that later.
For now it getting the rear window opening totally correct & the wheel arch hammered up & rocker edge glued ......
A day later it is the right hand quarter's turn to be glued. You can see the turned up wheel arch lip in this pic .......
The following day saw the roof skin glued. Fortunately I have a few pairs of vice grips
After the glue had set (24 hours) the panel joins (where the car previously had lead filler) were fully MIG welded so plastic filler could now be used .....
Kerry
To our wives and sweethearts. May they never meet
To our wives and sweethearts. May they never meet
Re: Ozbilt's last build for a client
After the quarters were "in place", I had finalized the door gaps. Then it was time to install the air ducting to the 67 Shelby specs ........
Kerry
To our wives and sweethearts. May they never meet
To our wives and sweethearts. May they never meet
Re: Ozbilt's last build for a client
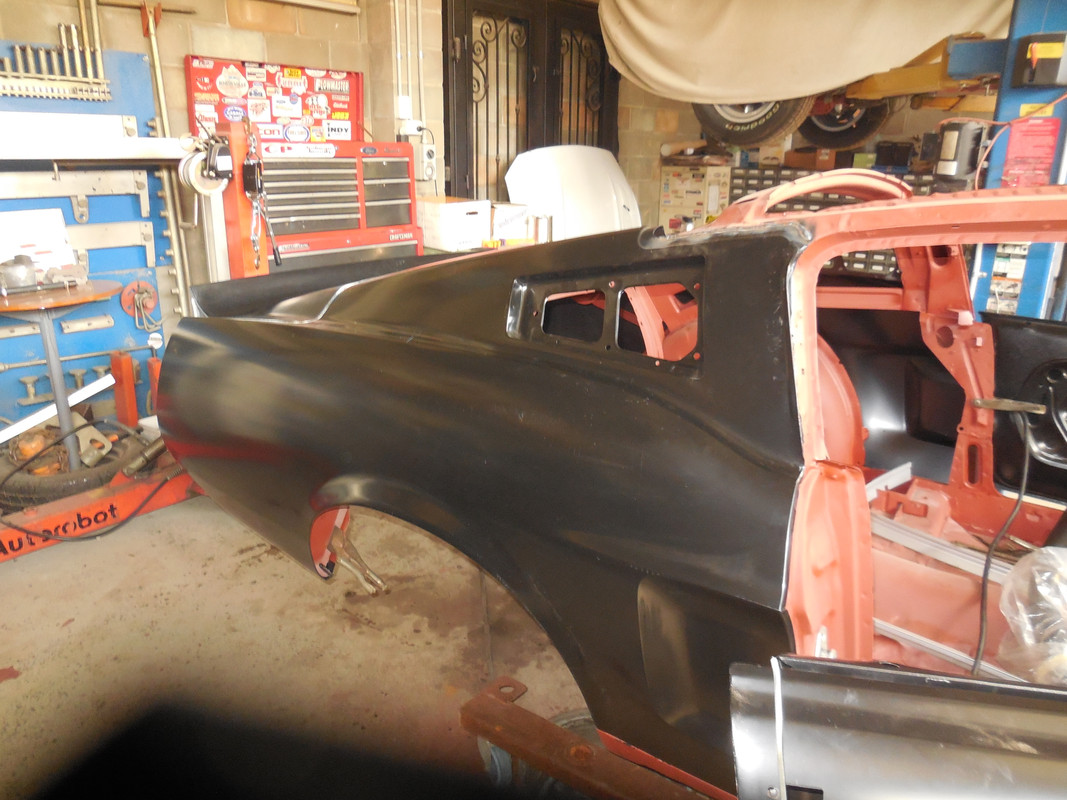
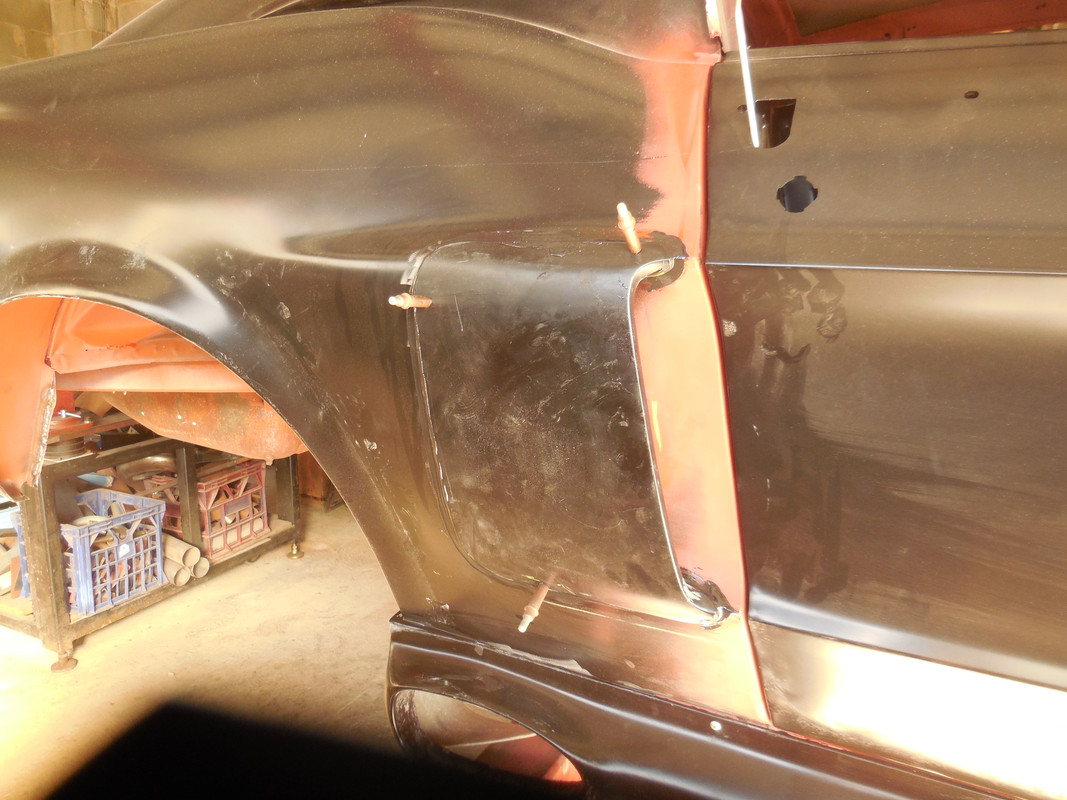
Then came time to "rough out the fitment of the side scoops. First get them somewhere the desired shape .......
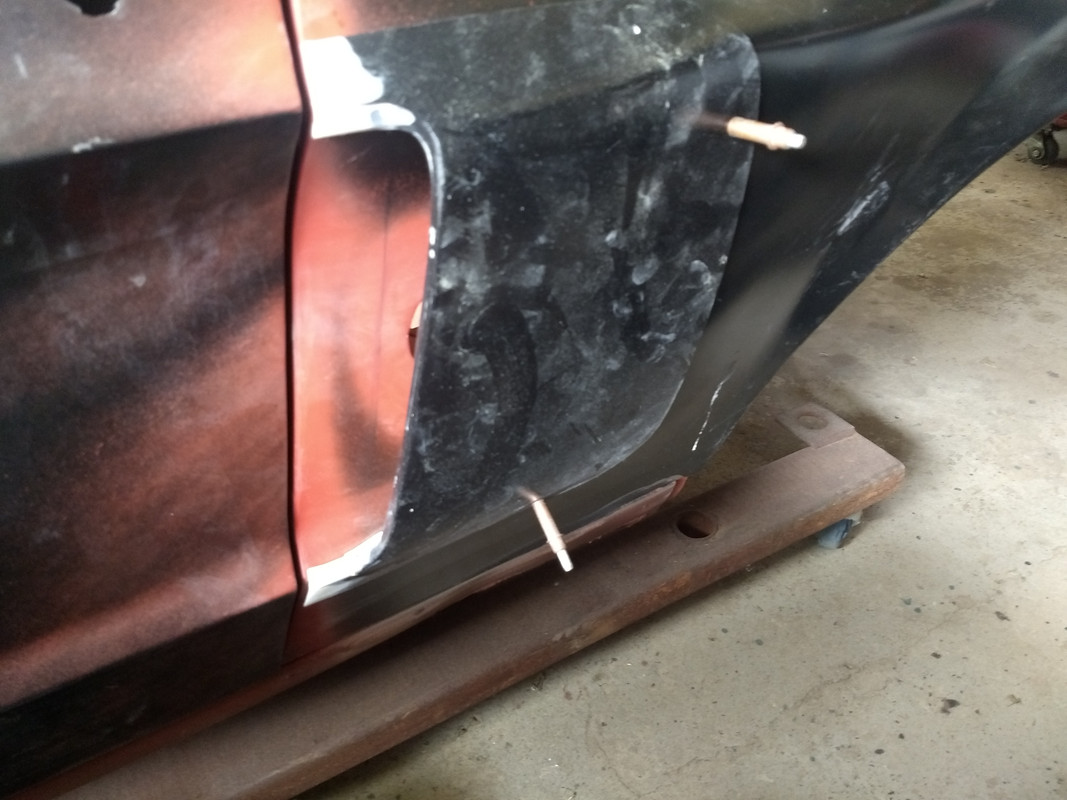
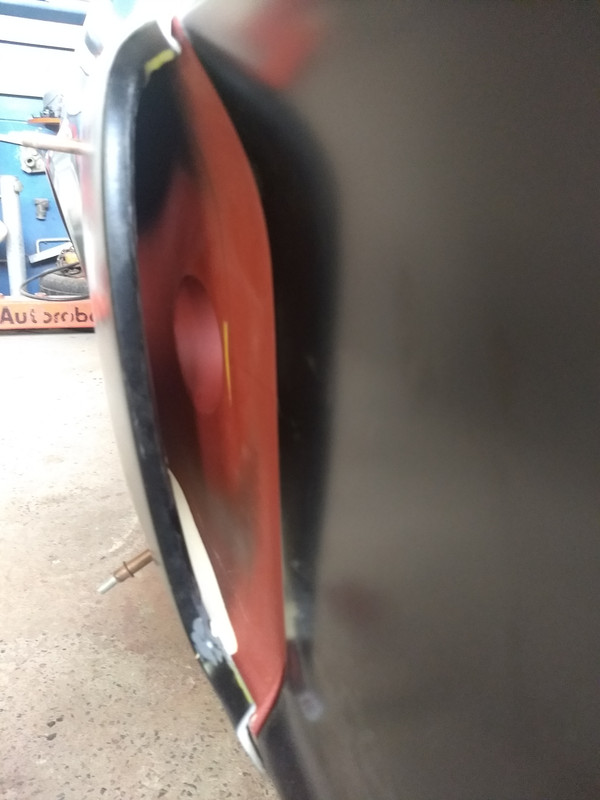
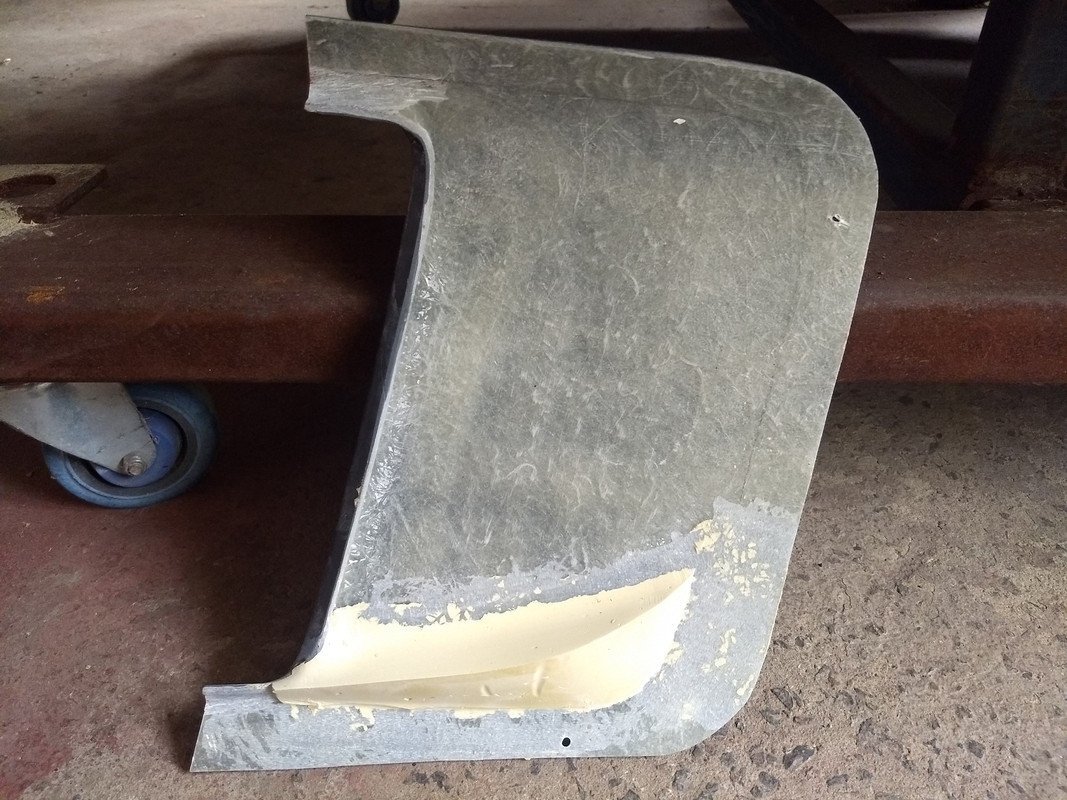
Then set them up so any water ingestion ran back out. I used plastic filler to form the shape needed on the inside before gluing them on. I had used stick on plastic on the quarter panel & pushed mixed filler in there to get the shape close. After it had set, I then shaped the filler as shown in this pic .......
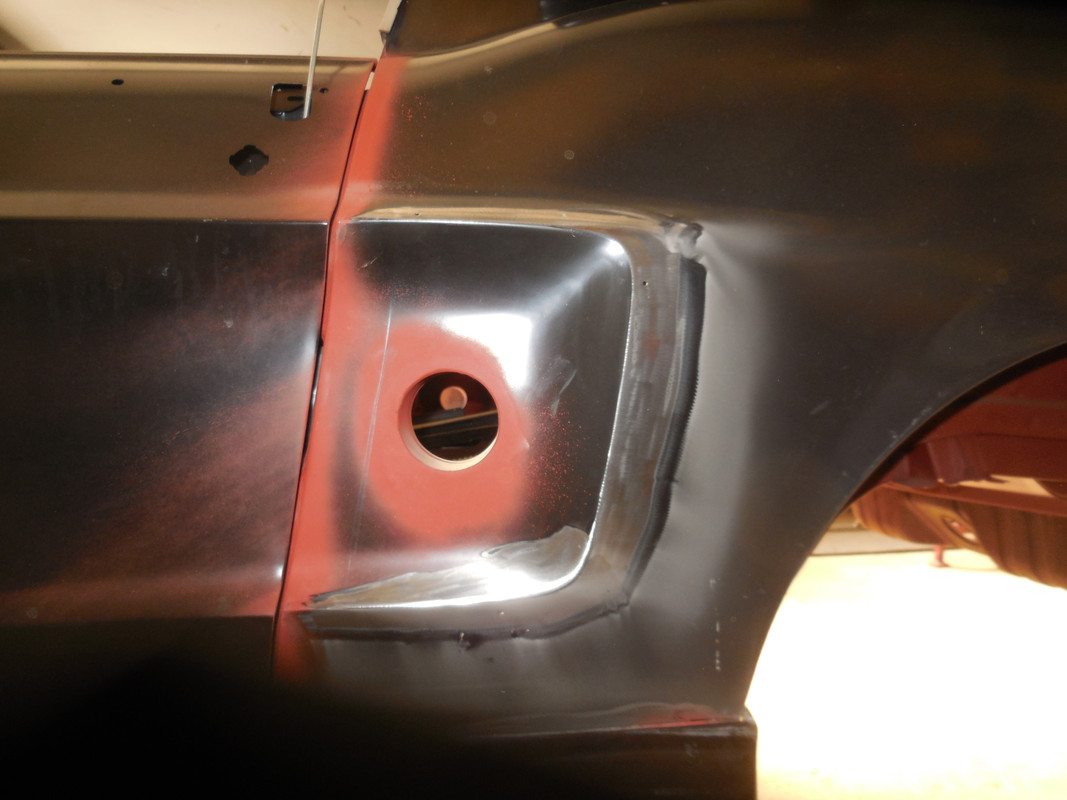
Before & after gluing .....

Then set them up so any water ingestion ran back out. I used plastic filler to form the shape needed on the inside before gluing them on. I had used stick on plastic on the quarter panel & pushed mixed filler in there to get the shape close. After it had set, I then shaped the filler as shown in this pic .......
Before & after gluing .....
Last edited by ozbilt on Fri Jul 31, 2020 9:41 am, edited 1 time in total.
Kerry
To our wives and sweethearts. May they never meet
To our wives and sweethearts. May they never meet
Re: Ozbilt's last build for a client
Nice write-up.
On those roof panel joins, you used a stitch weld; is that right? If so, did you knock back the settings to prevent holes and warping or just increase the speed across the panel?
Cheers
Jacko
On those roof panel joins, you used a stitch weld; is that right? If so, did you knock back the settings to prevent holes and warping or just increase the speed across the panel?
Cheers
Jacko
'68 J-code GT Fastback
'67 S-code GT coupe, 'Pink Bitz' formerly known as 'Hookin' up a brother'
'69 M_____ GTS Fastback 'Blasted'
'67 S-code GT coupe, 'Pink Bitz' formerly known as 'Hookin' up a brother'
'69 M_____ GTS Fastback 'Blasted'
Re: Ozbilt's last build for a client
He's a showoff Jacko!
My Motto - Don't get Caught! If you do, Blame Someone Else!
MUSTANG - Fantastic Not Plastic
MUSTANG - Fantastic Not Plastic
Re: Ozbilt's last build for a client
I always weld with the settings hot. I adjust my speed to suit depending on metal thickness. The quarter was welded (underneath that roof join) to the inner frame first. That gives a double thickness (lap weld) and allows a slower weld as there is extra heat sink. That top weld is therefore slower than the one under it.Ausjacko wrote:Nice write-up.
On those roof panel joins, you used a stitch weld; is that right? If so, did you knock back the settings to prevent holes and warping or just increase the speed across the panel?
Cheers
Jacko
Kerry
To our wives and sweethearts. May they never meet
To our wives and sweethearts. May they never meet
Re: Ozbilt's last build for a client
Thanks Big Mc
'68 J-code GT Fastback
'67 S-code GT coupe, 'Pink Bitz' formerly known as 'Hookin' up a brother'
'69 M_____ GTS Fastback 'Blasted'
'67 S-code GT coupe, 'Pink Bitz' formerly known as 'Hookin' up a brother'
'69 M_____ GTS Fastback 'Blasted'
Re: Ozbilt's last build for a client
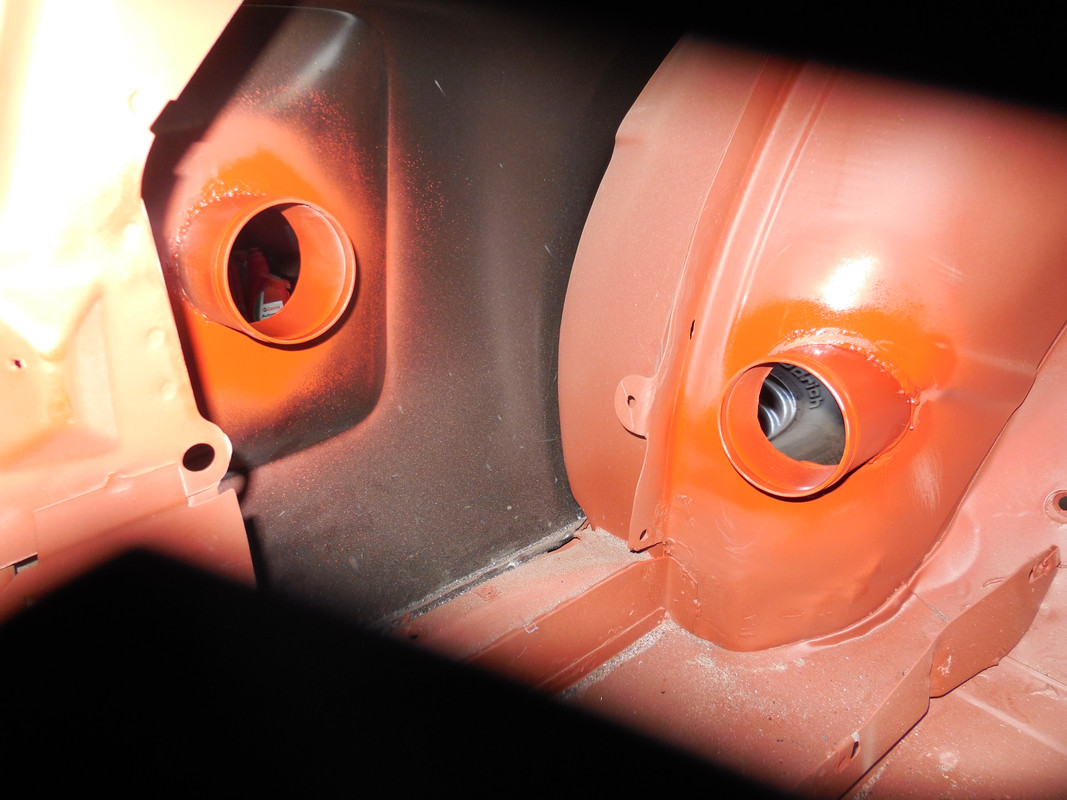
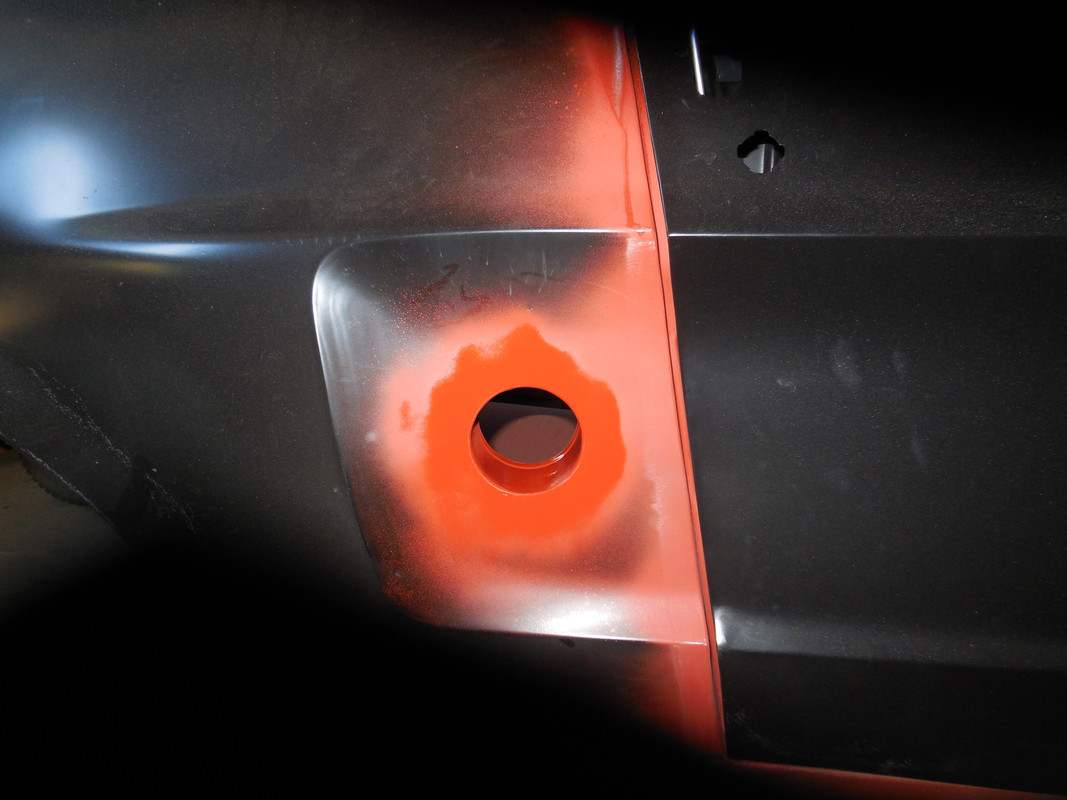
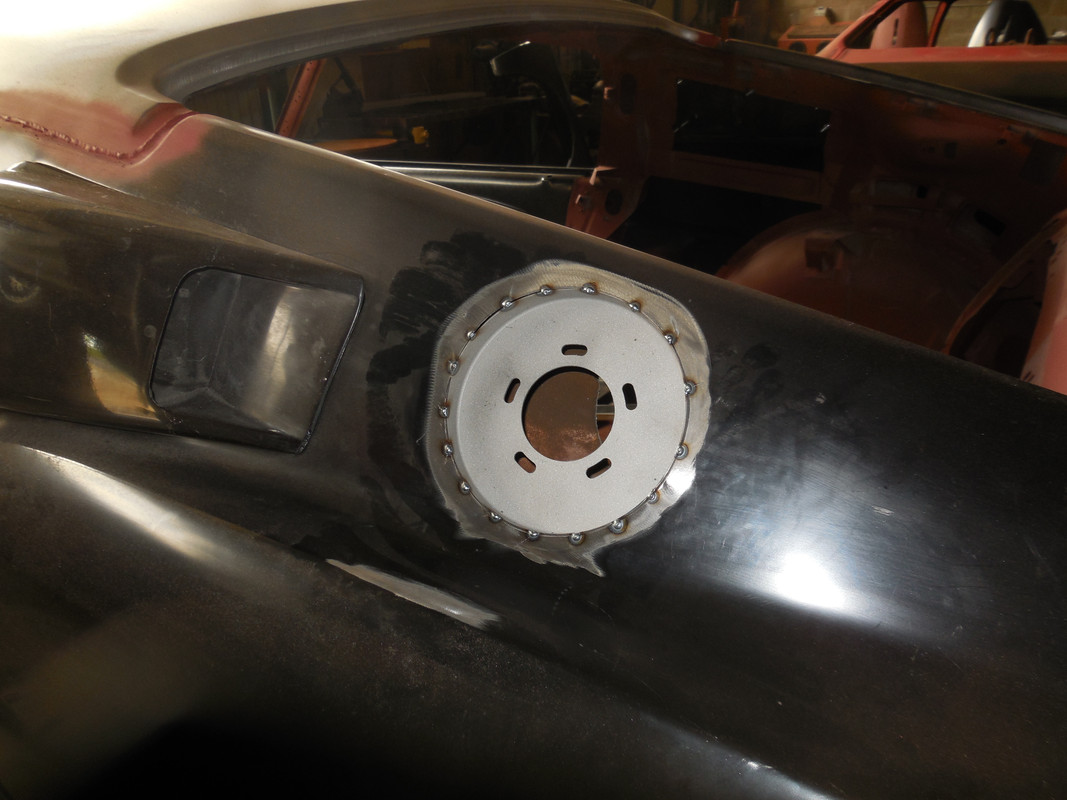
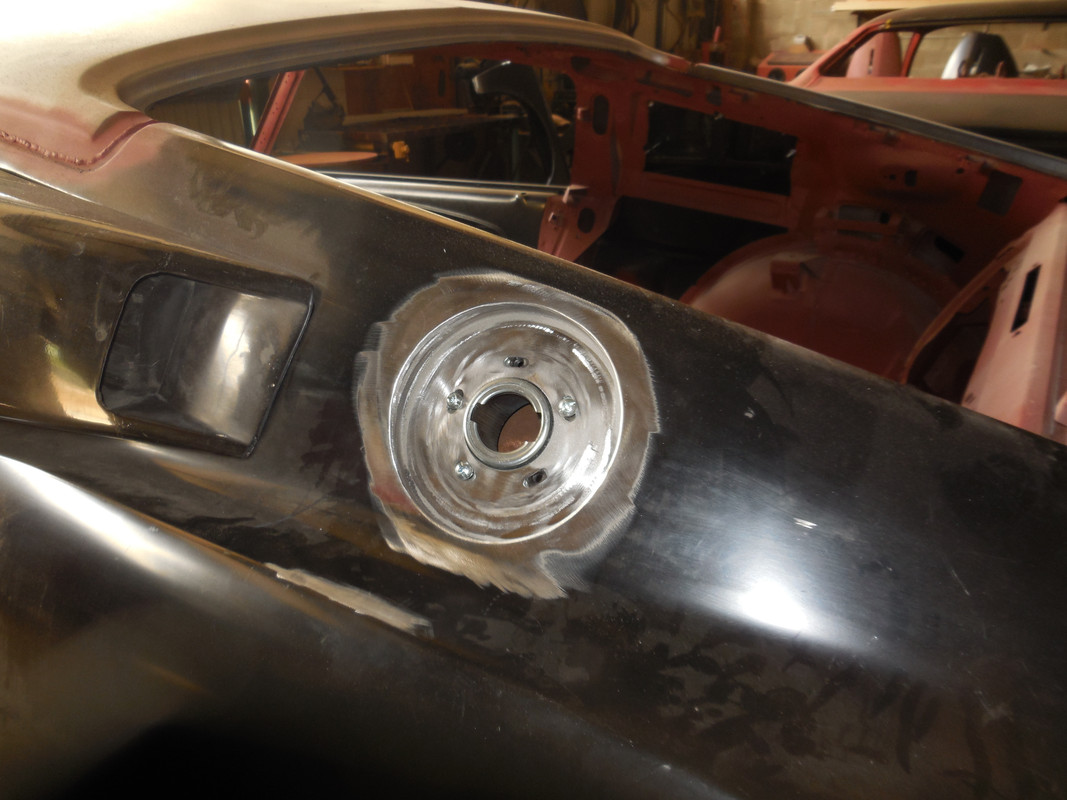
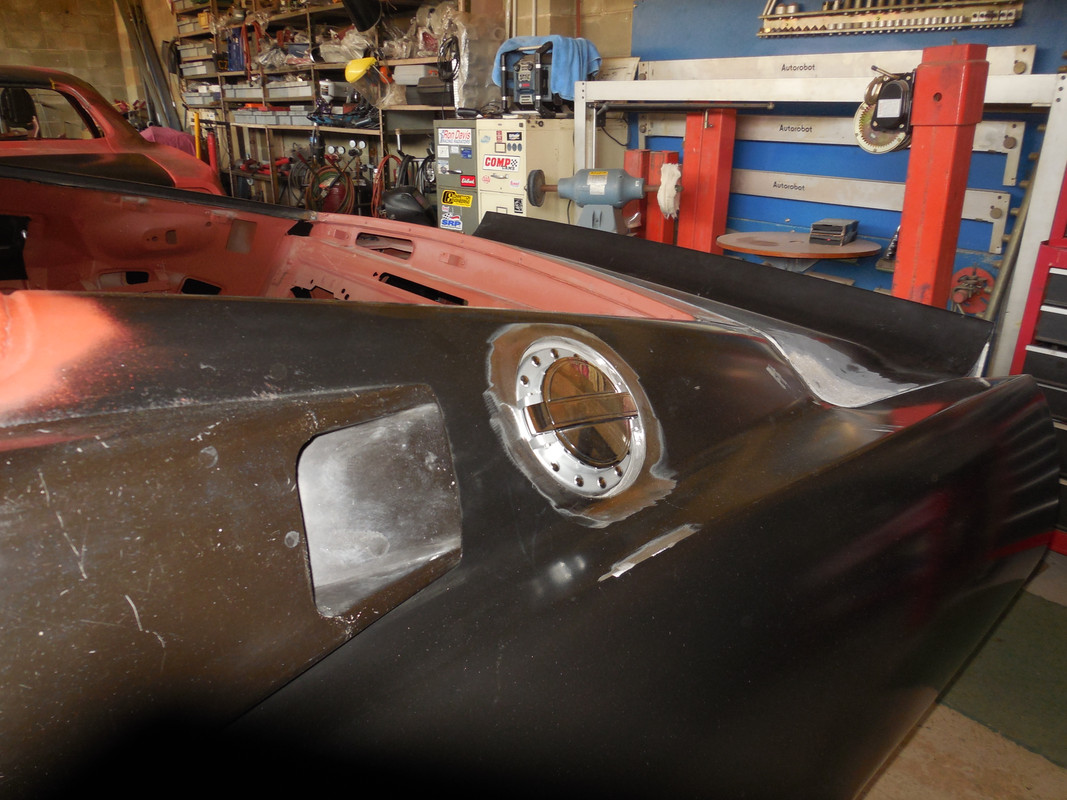
Fitting the quarter panel fuel filler cap & neck. First, fill the old filler neck & fuel cap position ........
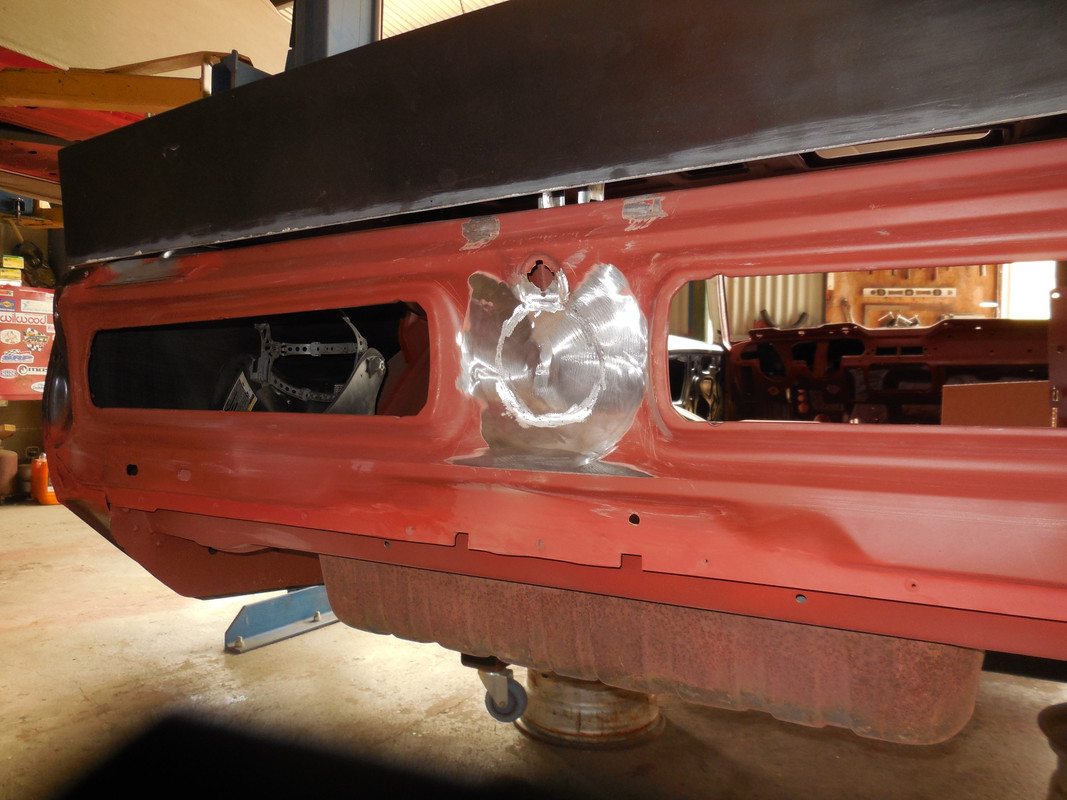
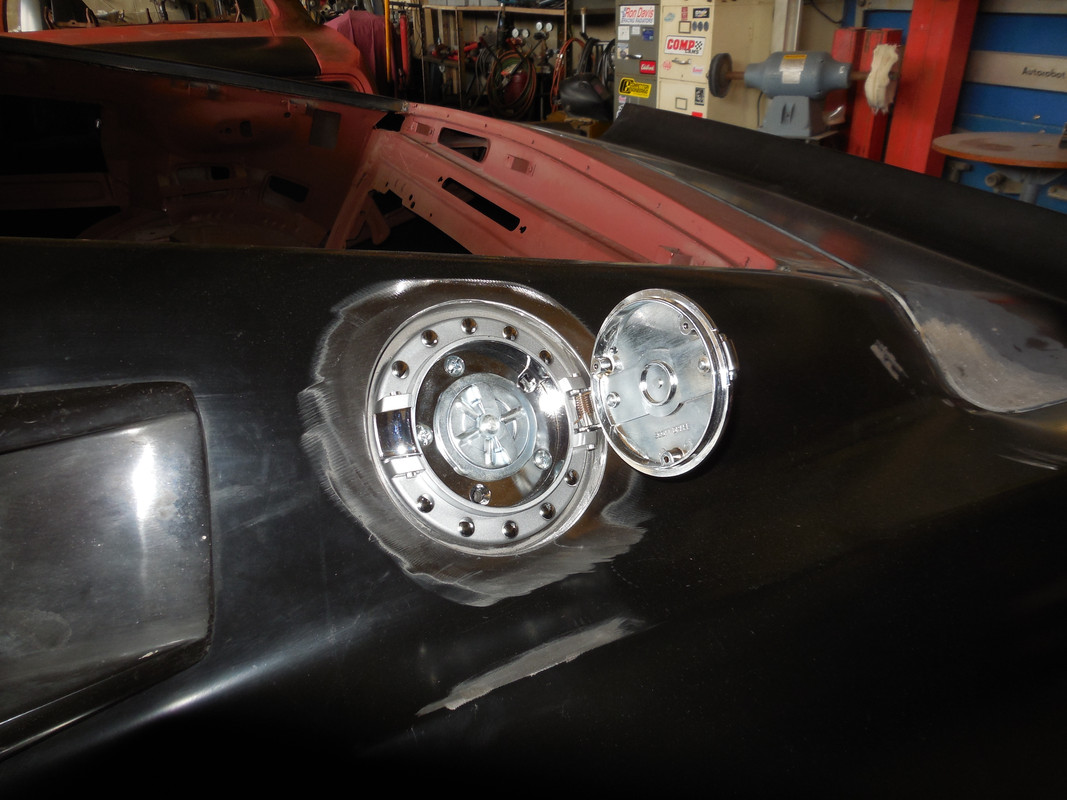
Then fit to the quarter panel ......
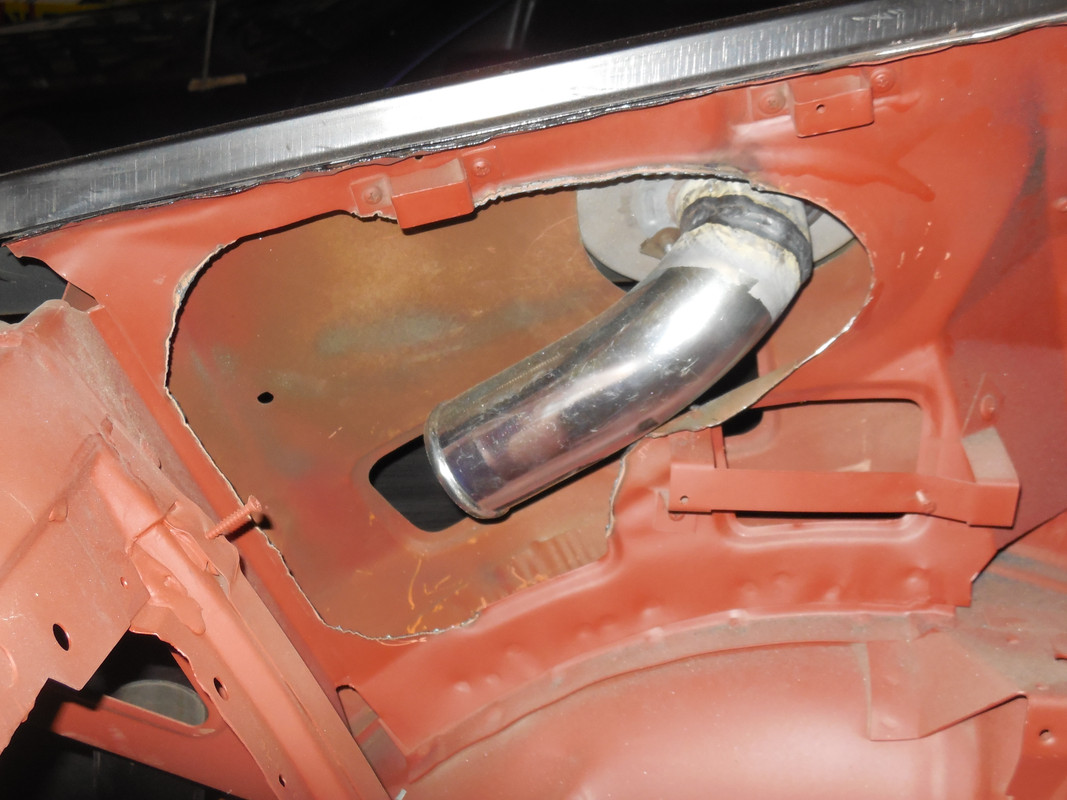
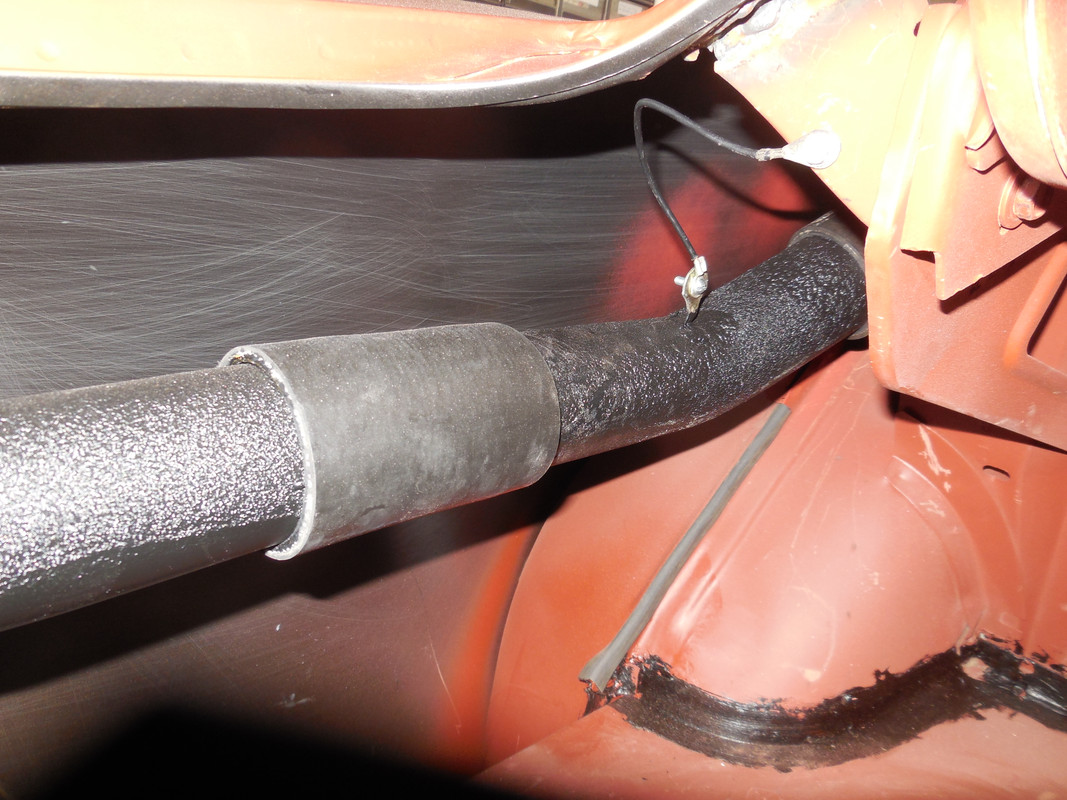
Next was fabricating the filler pipe & hoses .......
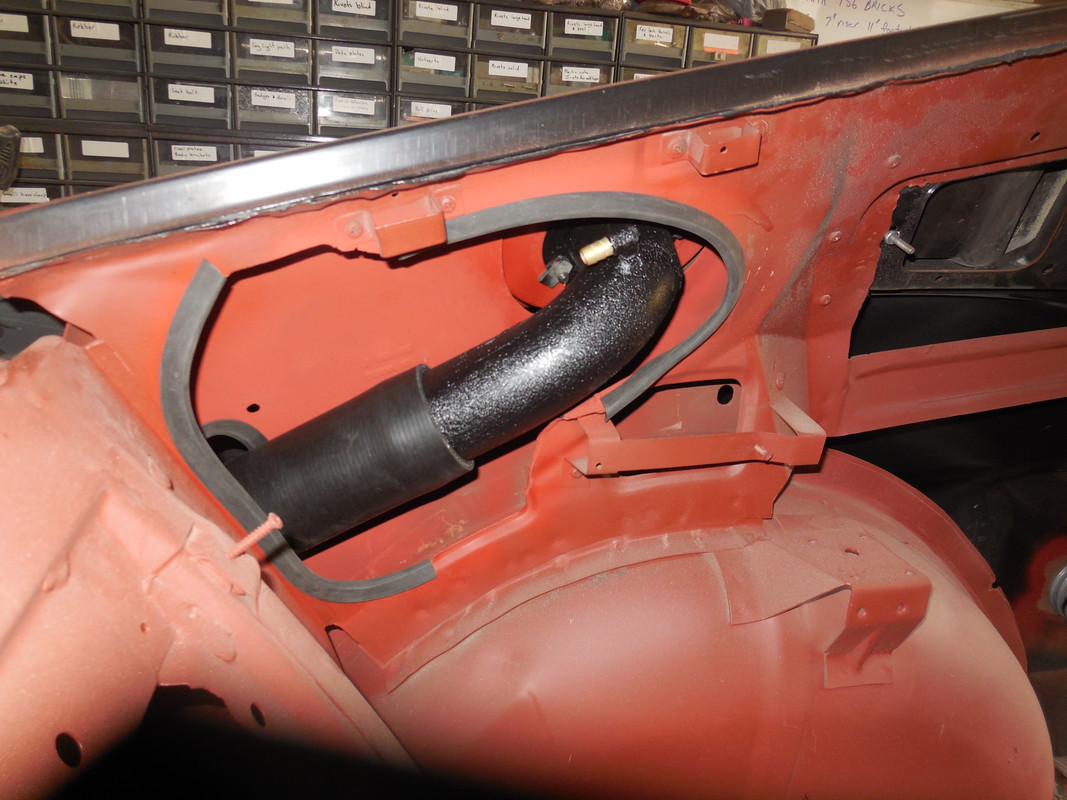
Note on the picture, I have a ground (earth) strap as this pipe is isolated from the others & could create a spark .....
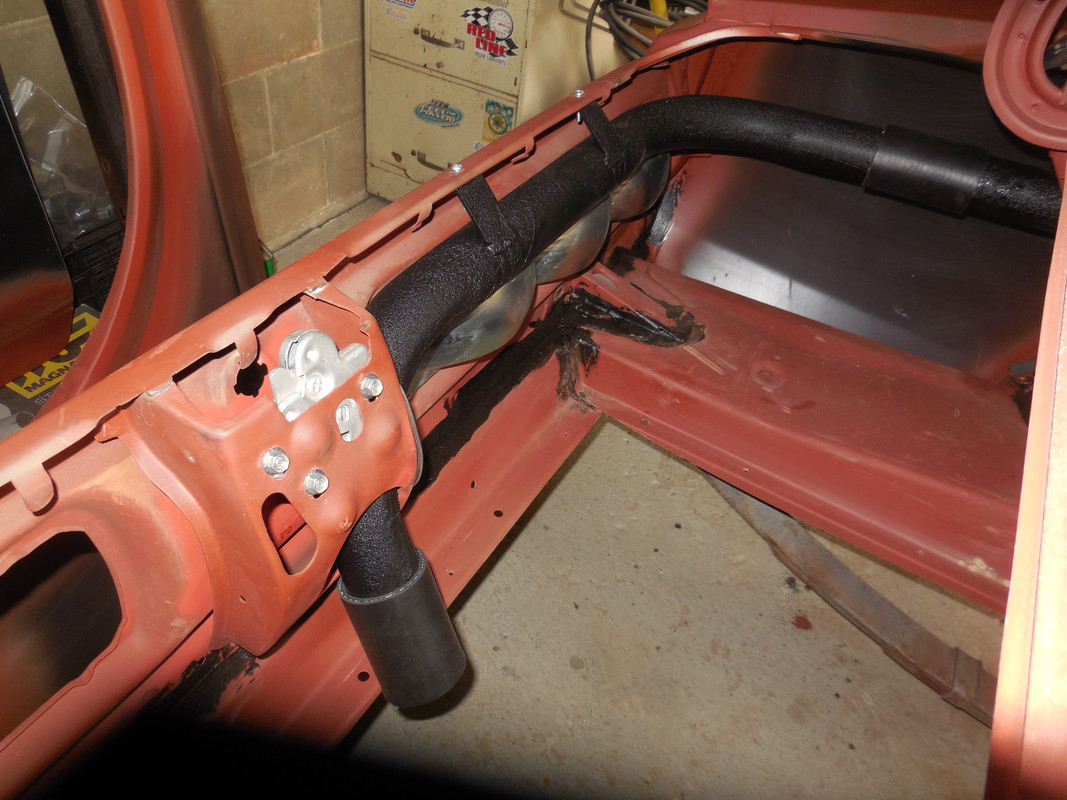
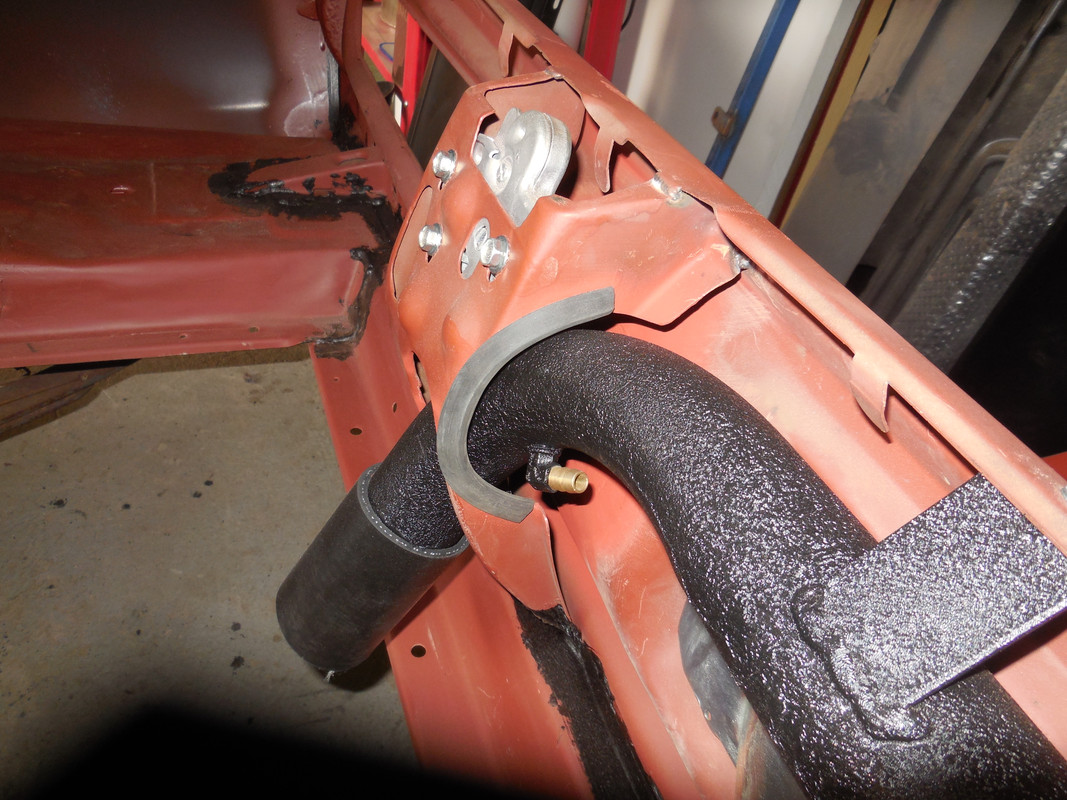
The completed pipe & attached to the tail light panel .......
Then fit to the quarter panel ......
Next was fabricating the filler pipe & hoses .......
Note on the picture, I have a ground (earth) strap as this pipe is isolated from the others & could create a spark .....
The completed pipe & attached to the tail light panel .......
Kerry
To our wives and sweethearts. May they never meet
To our wives and sweethearts. May they never meet
Re: Ozbilt's last build for a client
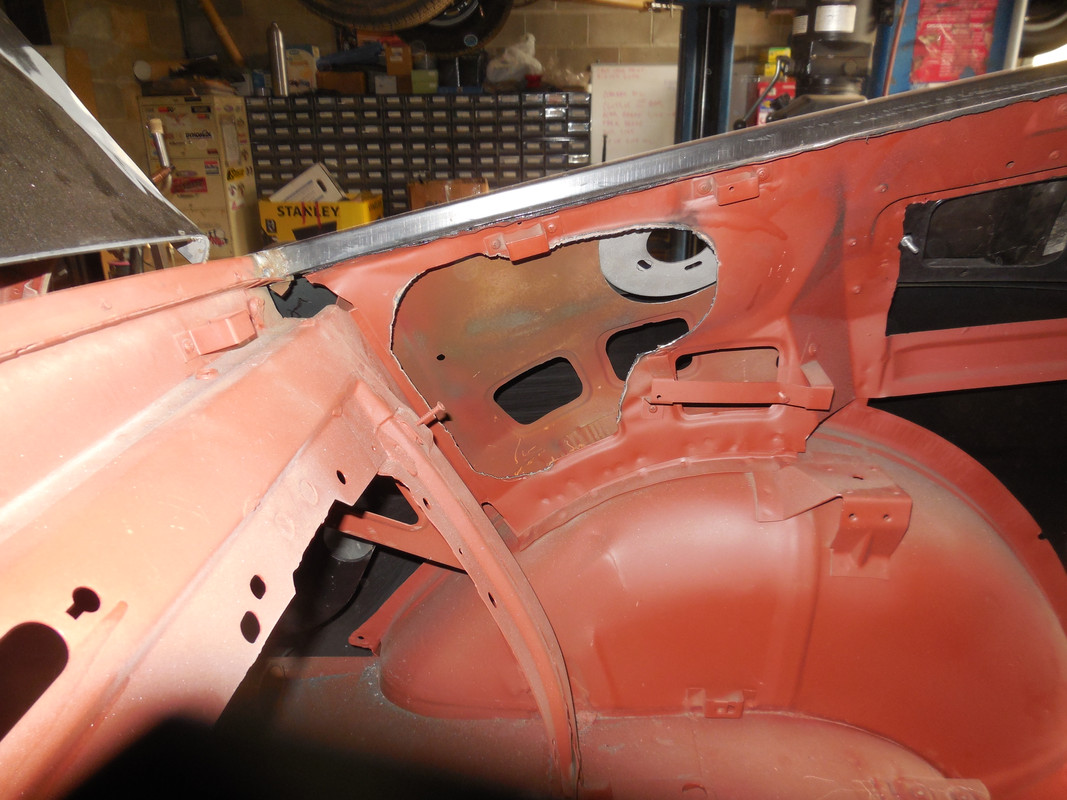
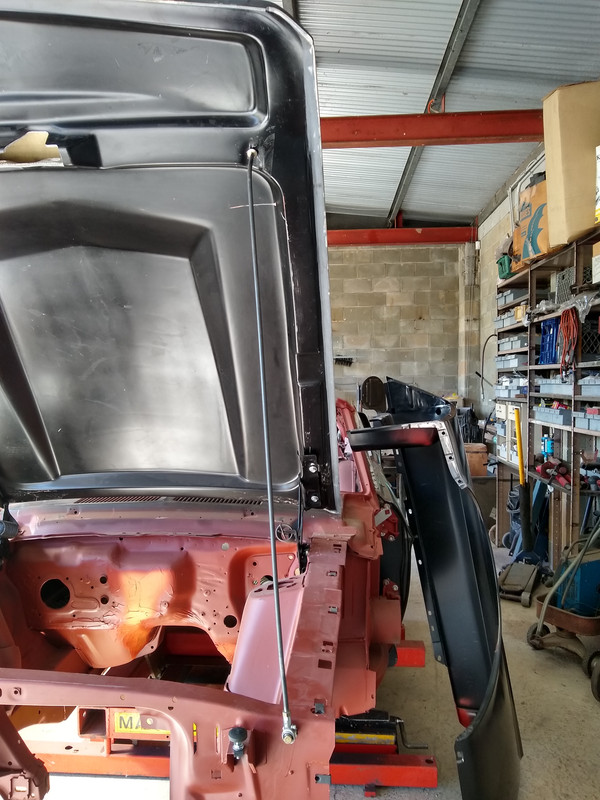
Another trick is using very light hood springs (1964 Comet & also 65/6 Shelby). The standard springs bow the fiberglass hoods as they are trying to lift the hood while the hood catch is holding the front down. I fit these springs only to open the hood (making it lighter to lift), however, they will not hold the hood up .....
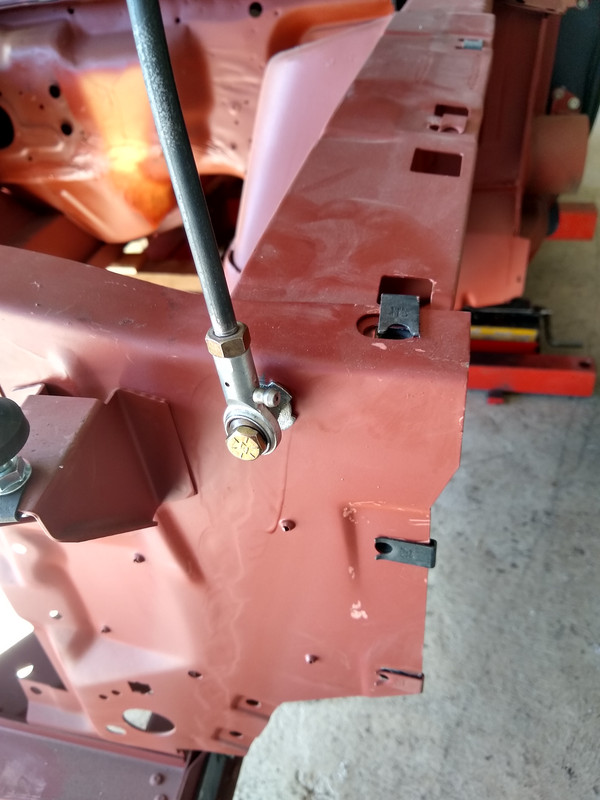
So a prop rod is needed ........
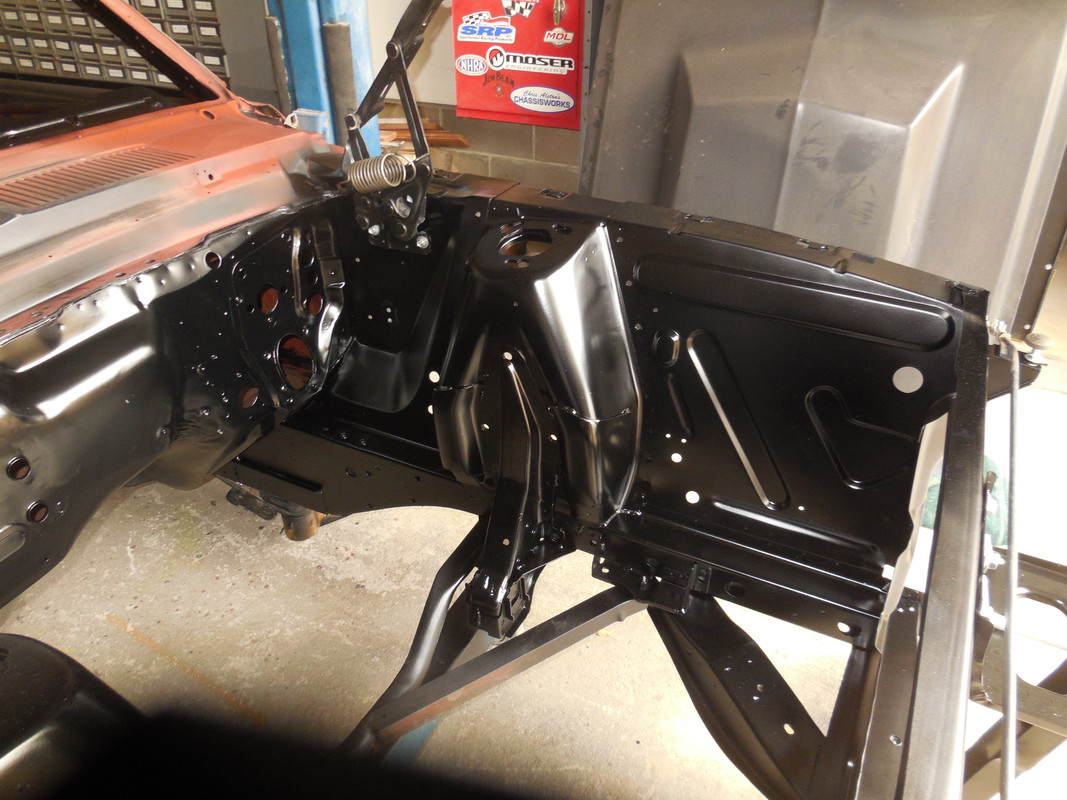
The fiberglass hood made the operation of the hinges move to a different position when closed, prompting a modification of the hinge support panels. Pictures show cut & massage which was then welded & dressed up .....

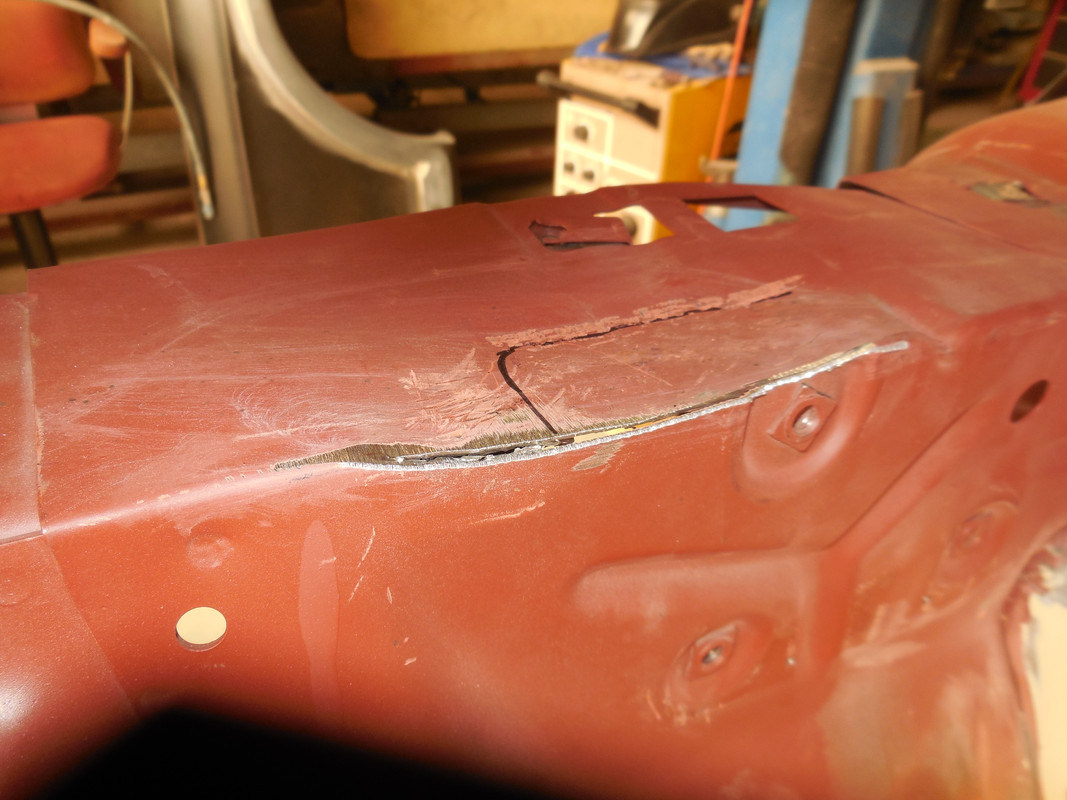
You can see the dip in the panel behind the hinge in the first picture of this post
So a prop rod is needed ........
The fiberglass hood made the operation of the hinges move to a different position when closed, prompting a modification of the hinge support panels. Pictures show cut & massage which was then welded & dressed up .....
You can see the dip in the panel behind the hinge in the first picture of this post
Kerry
To our wives and sweethearts. May they never meet
To our wives and sweethearts. May they never meet
-
MustangMedic
- Mustang King

- Posts: 2531
- Joined: Wed Jul 28, 2010 6:52 pm
- Contact:
Re: Ozbilt's last build for a client
Kerry,
I love watching you build things, the skill is amazing, following this build with great interest.
Regards
Medic
I love watching you build things, the skill is amazing, following this build with great interest.
Regards
Medic
Cheers.
Medic
(Always work smarter not harder!!!)
67 C Code coupe
Medic
(Always work smarter not harder!!!)
67 C Code coupe
Re: Ozbilt's last build for a client
Thanks Ash, great to see you still in touch.MustangMedic wrote:Kerry,
following this build with great interest.
Regards
Medic
Kerry
To our wives and sweethearts. May they never meet
To our wives and sweethearts. May they never meet